This guide relates to submitting notices to www.thegazette.co.uk, and assumes that a user is registered as a valid notice placer, with notice submission privileges enabled.
Getting started
Check that Javascript is enabled on your browser (find out how here). Once logged in, go to ‘My Gazette’:
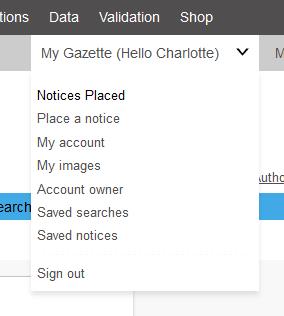
Notices placed: this will allow you to see which notices you have placed for publication, and which notice bundles are in progress. Within this section the tabs are headed as follows:
- Draft shows submitted bundles that have not yet gone through the checkout process. You can delete, review or place the notice bundle for publication using the ‘Actions’ drop-down list next to each bundle.
- Pending are notices that have gone through the checkout process and are waiting to be published. Notices in this tab will usually have a status of ‘paid and awaiting billing confirmation’, which means that the system is verifying the payment, or ‘ready to publish’, in which case they will be published on the requested publication day.
- Withdrawn are any notices that were sitting in the ‘pending’ tab but have been withdrawn from publication. Notices can be withdrawn at any time, providing they have not been published. If you withdraw a notice, the system will send you a confirmation email.
- Published are any notices that have successfully published.
Within each of these tabs, you can search for a specific Gazette notice ID, name, company, or any other component that is present in the notice, by using the search facility on the left-hand side of the page:

Place a notice: offers a selection of routes by which to place a notice.
My account: gives details of the account owner, the ability to amend details and any account number linked for billing purposes. Newsletter communication preferences can also be amended by clicking the ‘Edit profile’ function. You can link to an existing TSO billing account, or set up a new billing account by completing a credit application form.
My images: if your preferred submission route is via the Excel template, and you wish to add a company logo to your notice, you will first need to upload the image to the image repository. To add a logo to your notice when submitting via the online form, select the relevant option at the bottom of the form. To upload an image via xml submission, the image will need to be tagged as such within the xml file.
Account owner: you can invite other people in your team to submit notices, so they don't need to register themselves. However, each user will still have their own basket, and will have to submit notices independently.
Saved searches and notices: your notices and search criteria can be saved here.
Notice submission
Navigate to the ‘Place a notice’ section. Submission routes for placing a notice vary according to business and notice type. However, they are most commonly as follows:
Online webform
This is a webform with designated fields, and is for placing one notice at a time. Once you click on the blue ‘Place a notice’ button, you will be taken to the ‘Select notice type and edition’. Select the edition you wish to place the notice in – London, Edinburgh or Belfast – the ‘Notice sub-type’ category, and then the ‘Notice sub-type’. Once you have selected your options, click ‘Continue’ and complete the required fields.
XML upload
This is a code-based submission route, and you’ll need a valid xml file to upload to The Gazette website. This requires xml developer skills to construct an xml file, usually straight out of an in-house case management system, with items in the notices tagged in a specific manner. This route is for users who submit a high volume of notices – anything from 10 to 500+ notices – though it is worth bearing in mind that the bigger the xml bundle, the longer it will take to process and upload during submission.
Excel template upload
This submission route is only available for deceased estates notices and is ideal for a medium volume of notices. You can download Excel templates from the ‘Templates’ panel on the right-hand side of the ‘Place a notice’ page. These templates can submit up to 20 notices in a single submission.
To submit further notices, complete another Excel template. Because the fields on the Excel template are hardcoded to allow notice submission, you will not be able to add or delete rows. Simply fill in the required fields, save it to a location on your device and then submit to the website using the ‘choose document’ function. The file extension of the Excel template must be ‘.xls’.
Depending on the Excel version installed on your device, the template can sometimes save itself with a file extension of ‘.xlsx’, which will not upload to The Gazette website. If this happens, open the document and re-save as an Excel 97-2003 Workbook (.xls) file.
Submitted notices
(This does not apply to a notice submitted via the online form.)
Once you have submitted your Excel template or xml bundle, you will be taken to the ‘Submitted notices’ page that shows a list of the individual notices that were submitted in the original bundle.
If any notices within the bundle failed Gazette validation while processing, they will be shown as validation errors. If this is the case, clicking the ‘Validation report’ function next to the button will tell you why the notice has failed. You then have two options:
- Continue to submit the bundle anyway. This will submit all of the validated notices for review, but none of the notices that failed. You will then need to correct the notice validation errors and submit this corrected bundle, containing the corrected notices, again.
- Cancel the entire submission, go back and correct the notices in the original template or xml bundle and resubmit as a whole submission.
If all of the notices successfully passed validation, you can choose to remove any notices that you don’t want to submit by clicking the ‘Remove this notice’ button next to the relevant notice. You can also remove notices once you arrive at the checkout stage.
Preview your notices
Click ‘Continue’ at the bottom of the page to go to the ‘Preview notices’ section. This is your last opportunity to check and proofread the notices. It will depend on your own internal processes, but proofing information will usually be done at the xml or Excel template creation stage, when you enter the data. For notices submitted via the online form, this is a good time to check that all of the relevant details have been added to the notice. (See also: Terms and conditions relating to submission of notices).
On the right-hand side of the screen is a calculation of what you’ll pay at the checkout. If you have a process in place to record the notice ID for each notice you submit, this will be the best time to make a note of it, since you can easily see the details of each notice.
Checkout
To proceed to checkout, select ‘Add all notices to basket’. The next page will confirm that the action has been completed, and you will see the number of notices to be updated in your checkout basket:

At this stage, you can either leave the items in the basket and add more later, or go straight to checkout and submit the notices for publication. Items will stay in the basket until they are submitted to checkout or removed.
Clicking on the checkout button will start the payment journey process.
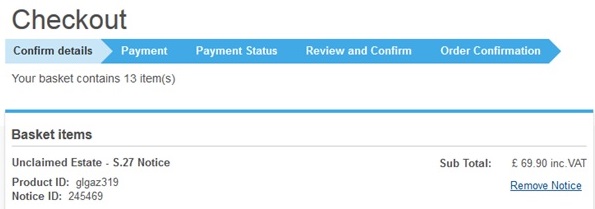
Confirm details
This shows all the notices you have in your basket. At this stage, you can remove a notice from the basket so that it is not included in the checkout process. You will need to know the Gazette notice ID in order to do this.
Choose your payment option and then proceed through the payment process. This is shown at the top of the page during the checkout process:
Once you reach 'Order confirmation', your notices have been submitted for publication. You will receive a confirmation email of the notices submitted, including all the individual Gazette notice IDs.
After checkout
Once your notices have been submitted, they will appear in the ‘Pending’ tab on your ‘Notices placed’ page. After submission, all notices will have a status of ‘Paid and awaiting billing confirmation’ while payment is processed. This usually takes about five minutes.
As soon as this is complete, the status of the notices will change to ‘ready to publish’. If you have selected same day publication, these notices should be published to the website within the next 10 minutes. If you have selected a future publication date, the notices will publish between midnight and 1pm on the requested date.
If you have any queries regarding how to submit notices for publication, the Gazette customer services team will be happy to advise you and can be contacted Monday to Friday, 8am to 6pm.